Great to see a Zero out on the road and being enjoyed in the USA.....
/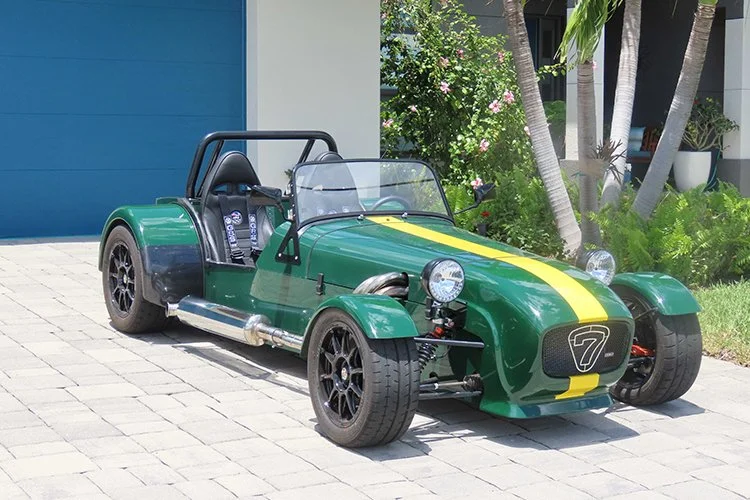
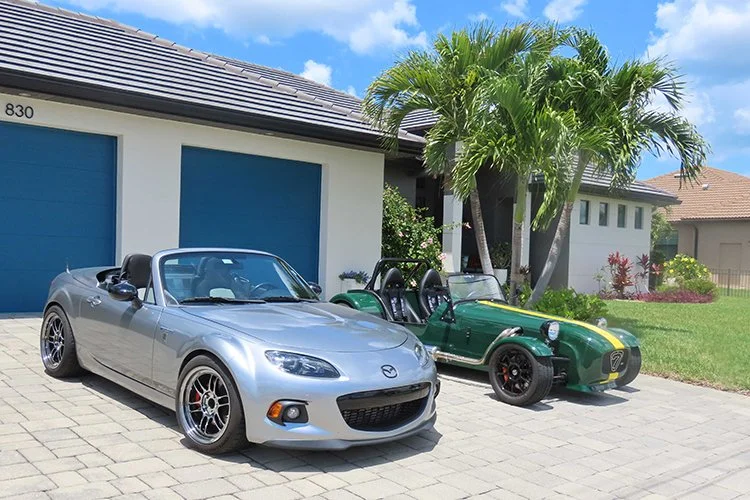
We love seeing Zeros being driven all over the world — on the road and on track. This one, based in Florida, has already covered its first 250 miles. GBS Customer Dana has sent us over some photos and shared details on his build and what he has done to it -
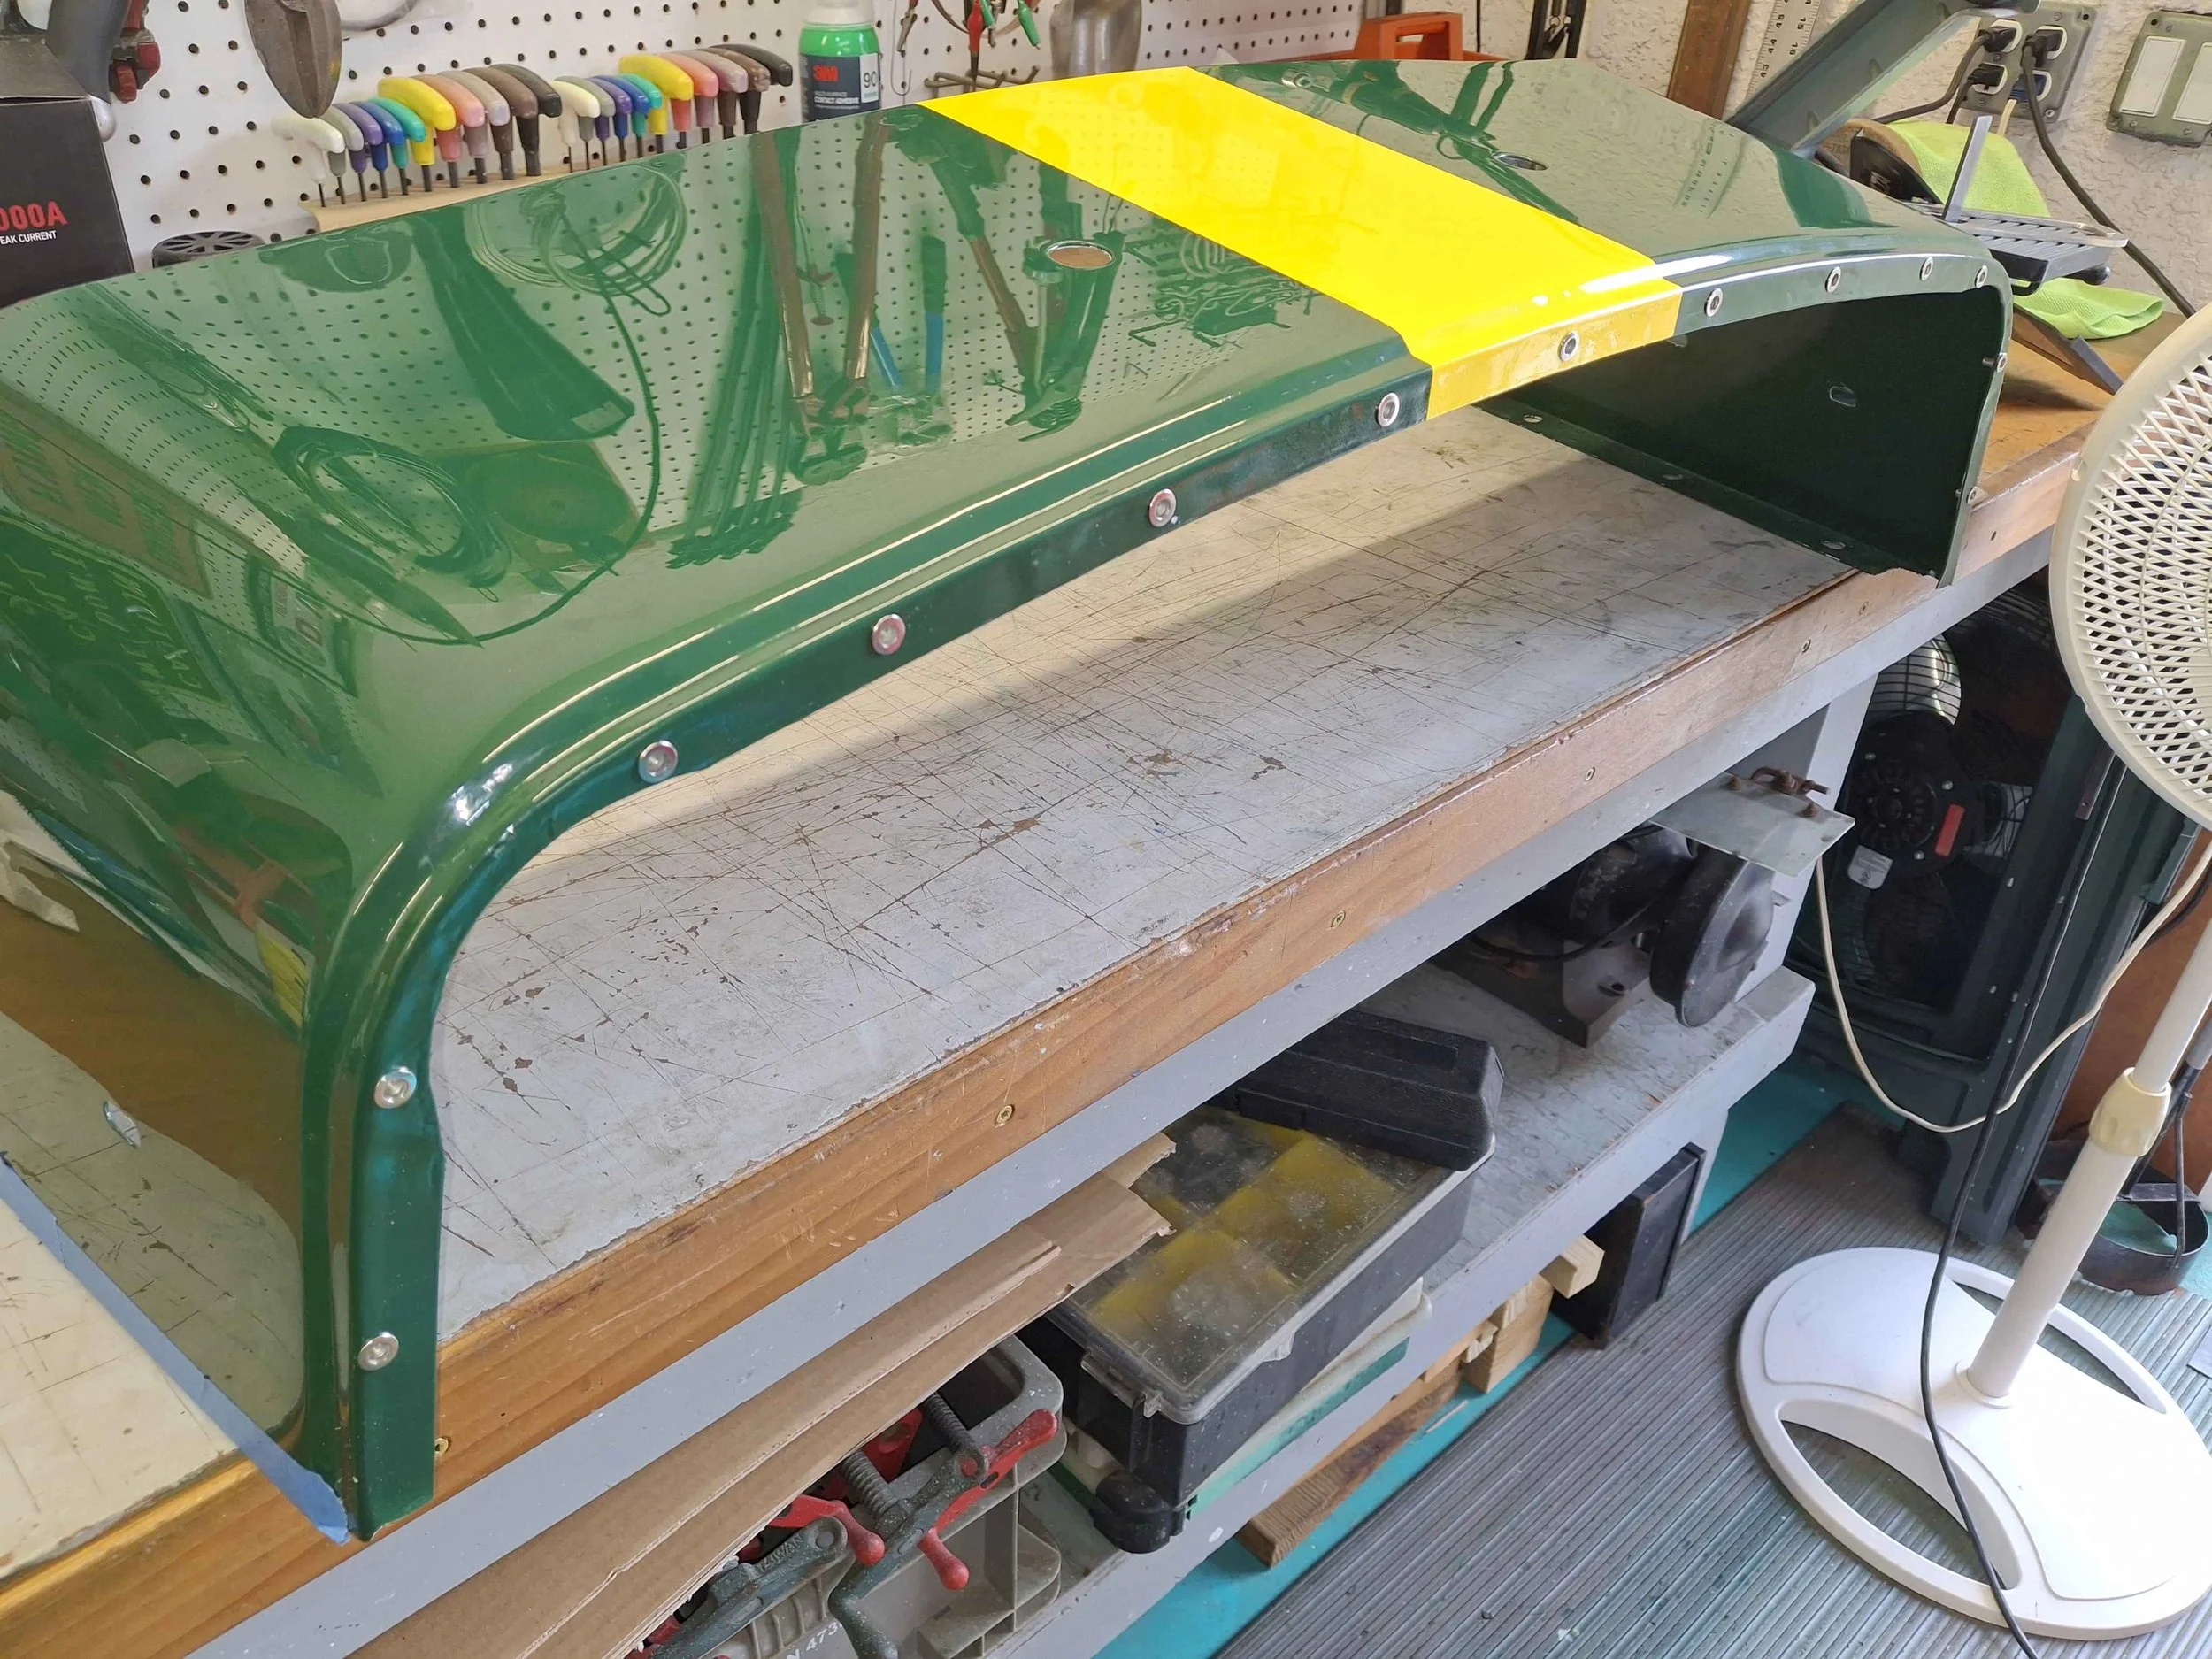
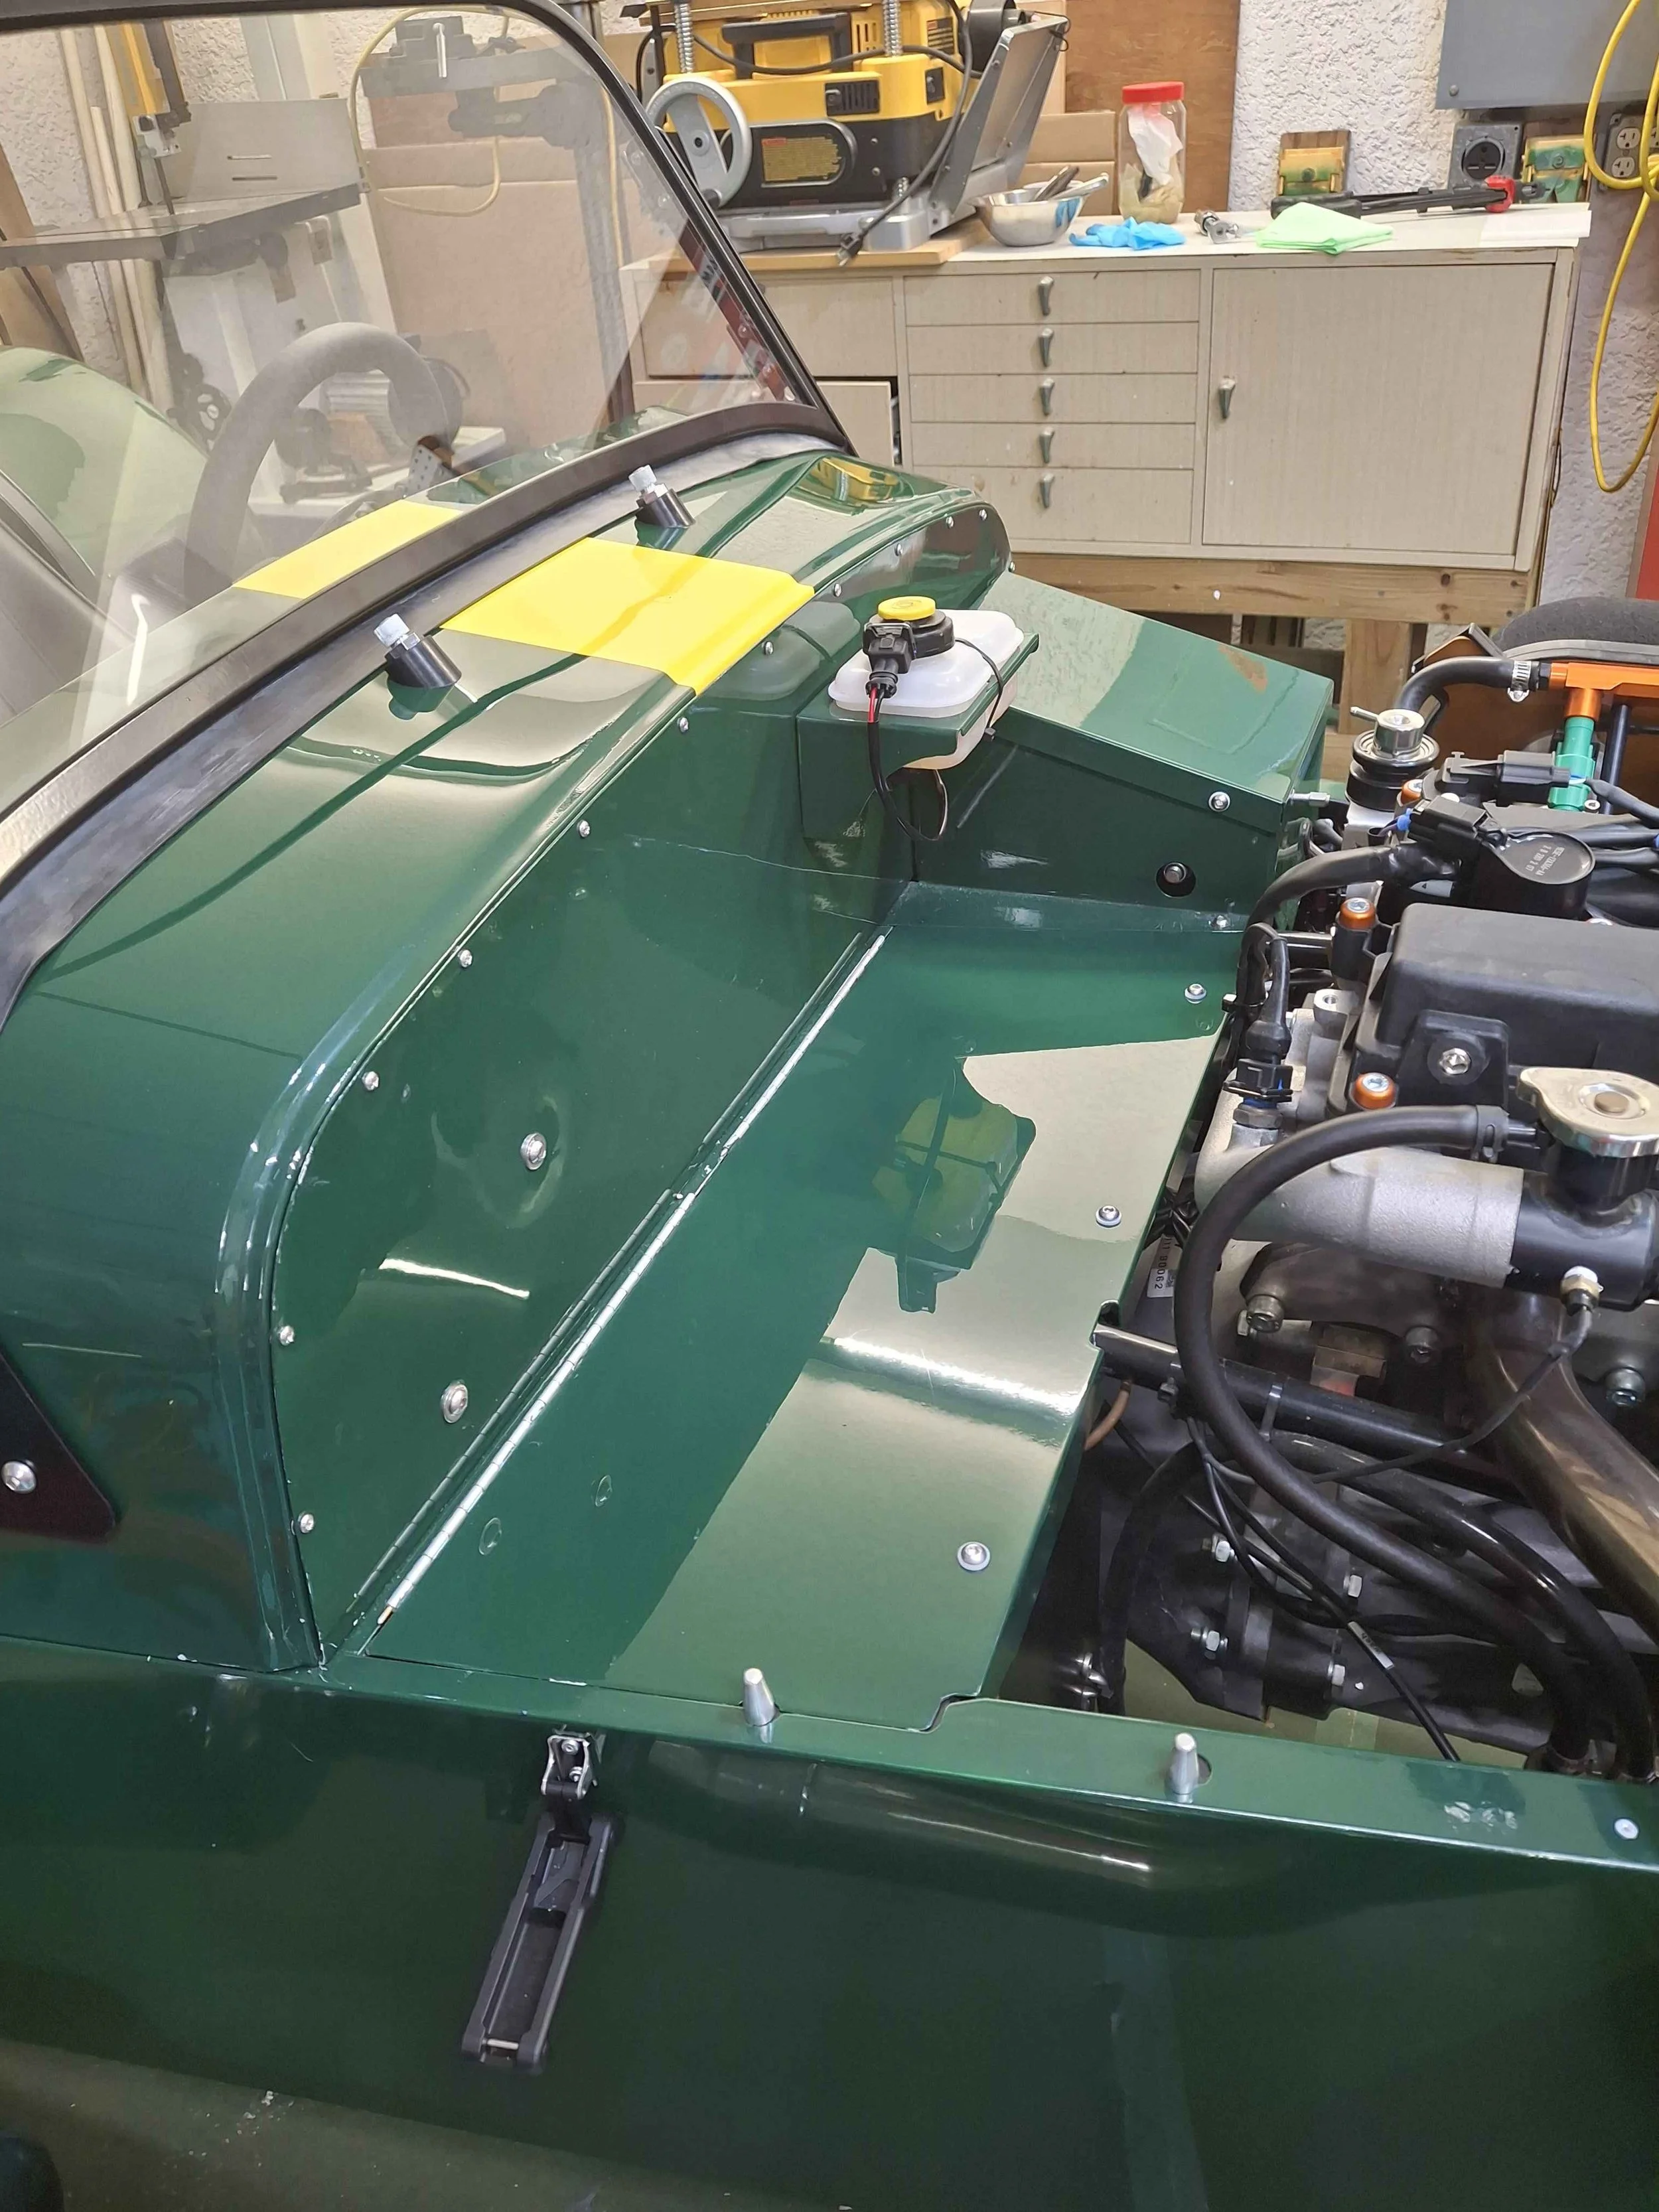
Dana said “I've been at the car for almost three years and it's now licensed and registered in the US. I'm slowly increasing the range of drives as I gain confidence in the build. I started the car as I wanted a long term project and have been working slowly, concentrating on quality time rather than just getting it built. I had the fiberglas parts scanned, got custom paint to match and painted it in my garage. The color per Valspar is "School bus green" but it looks like BRG to me! (I have the colour formula is anyone needs it). The yellow stripe is 3M vinyl car wrap which I applied using their fine line tape. I've also made a number of mods to make it easier to build and maintain such as hinged/removeable panels, inspection ports, screws rather than rivets, etc.
I've built houses, a couple airplanes and several boats but this is the first car(mods to the engine/suspension on the MX-5 were my last long project). The 7 still needs a few things tweaked and some final trim and I expect to be totally done this summer. I'm just taking a break from working on it now to enjoy the spring weather - it is a blast to drive and attracts attention everywhere”.
”Here’s a list of most of the mods I made to the GBS, hopefully for the better-
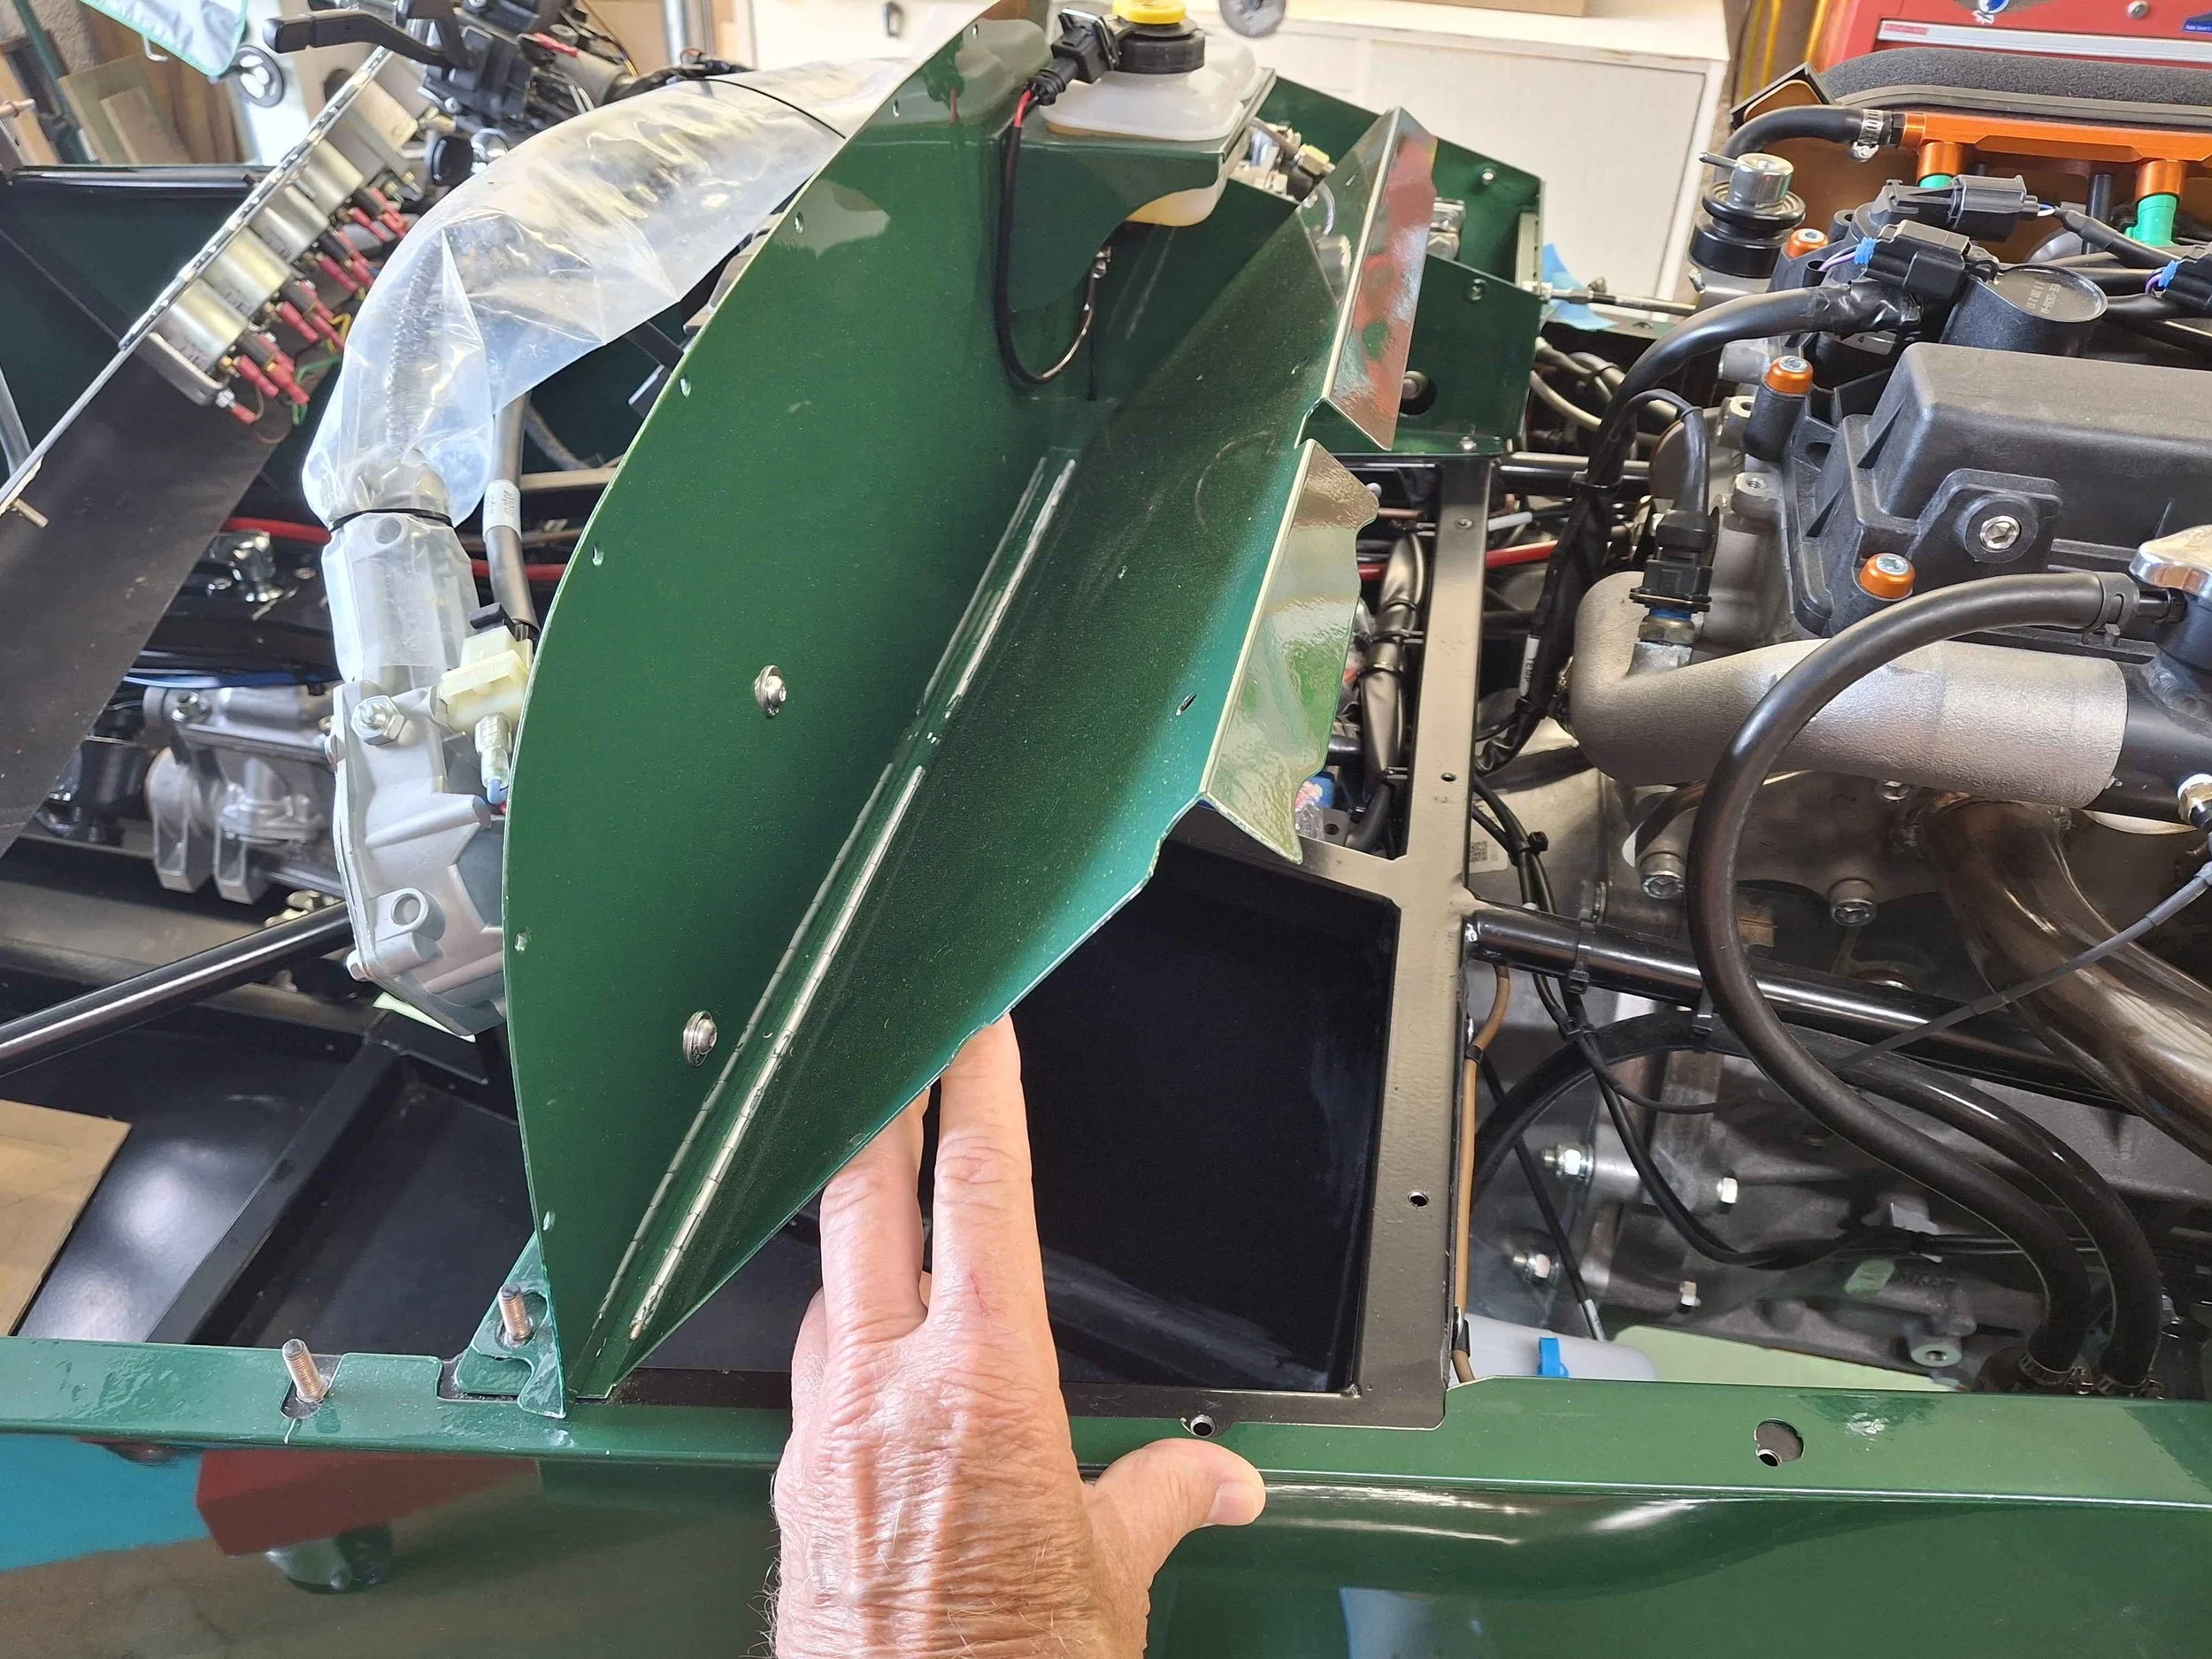
- An aircraft-type inspection port over the oil filter so it can be easily removed.
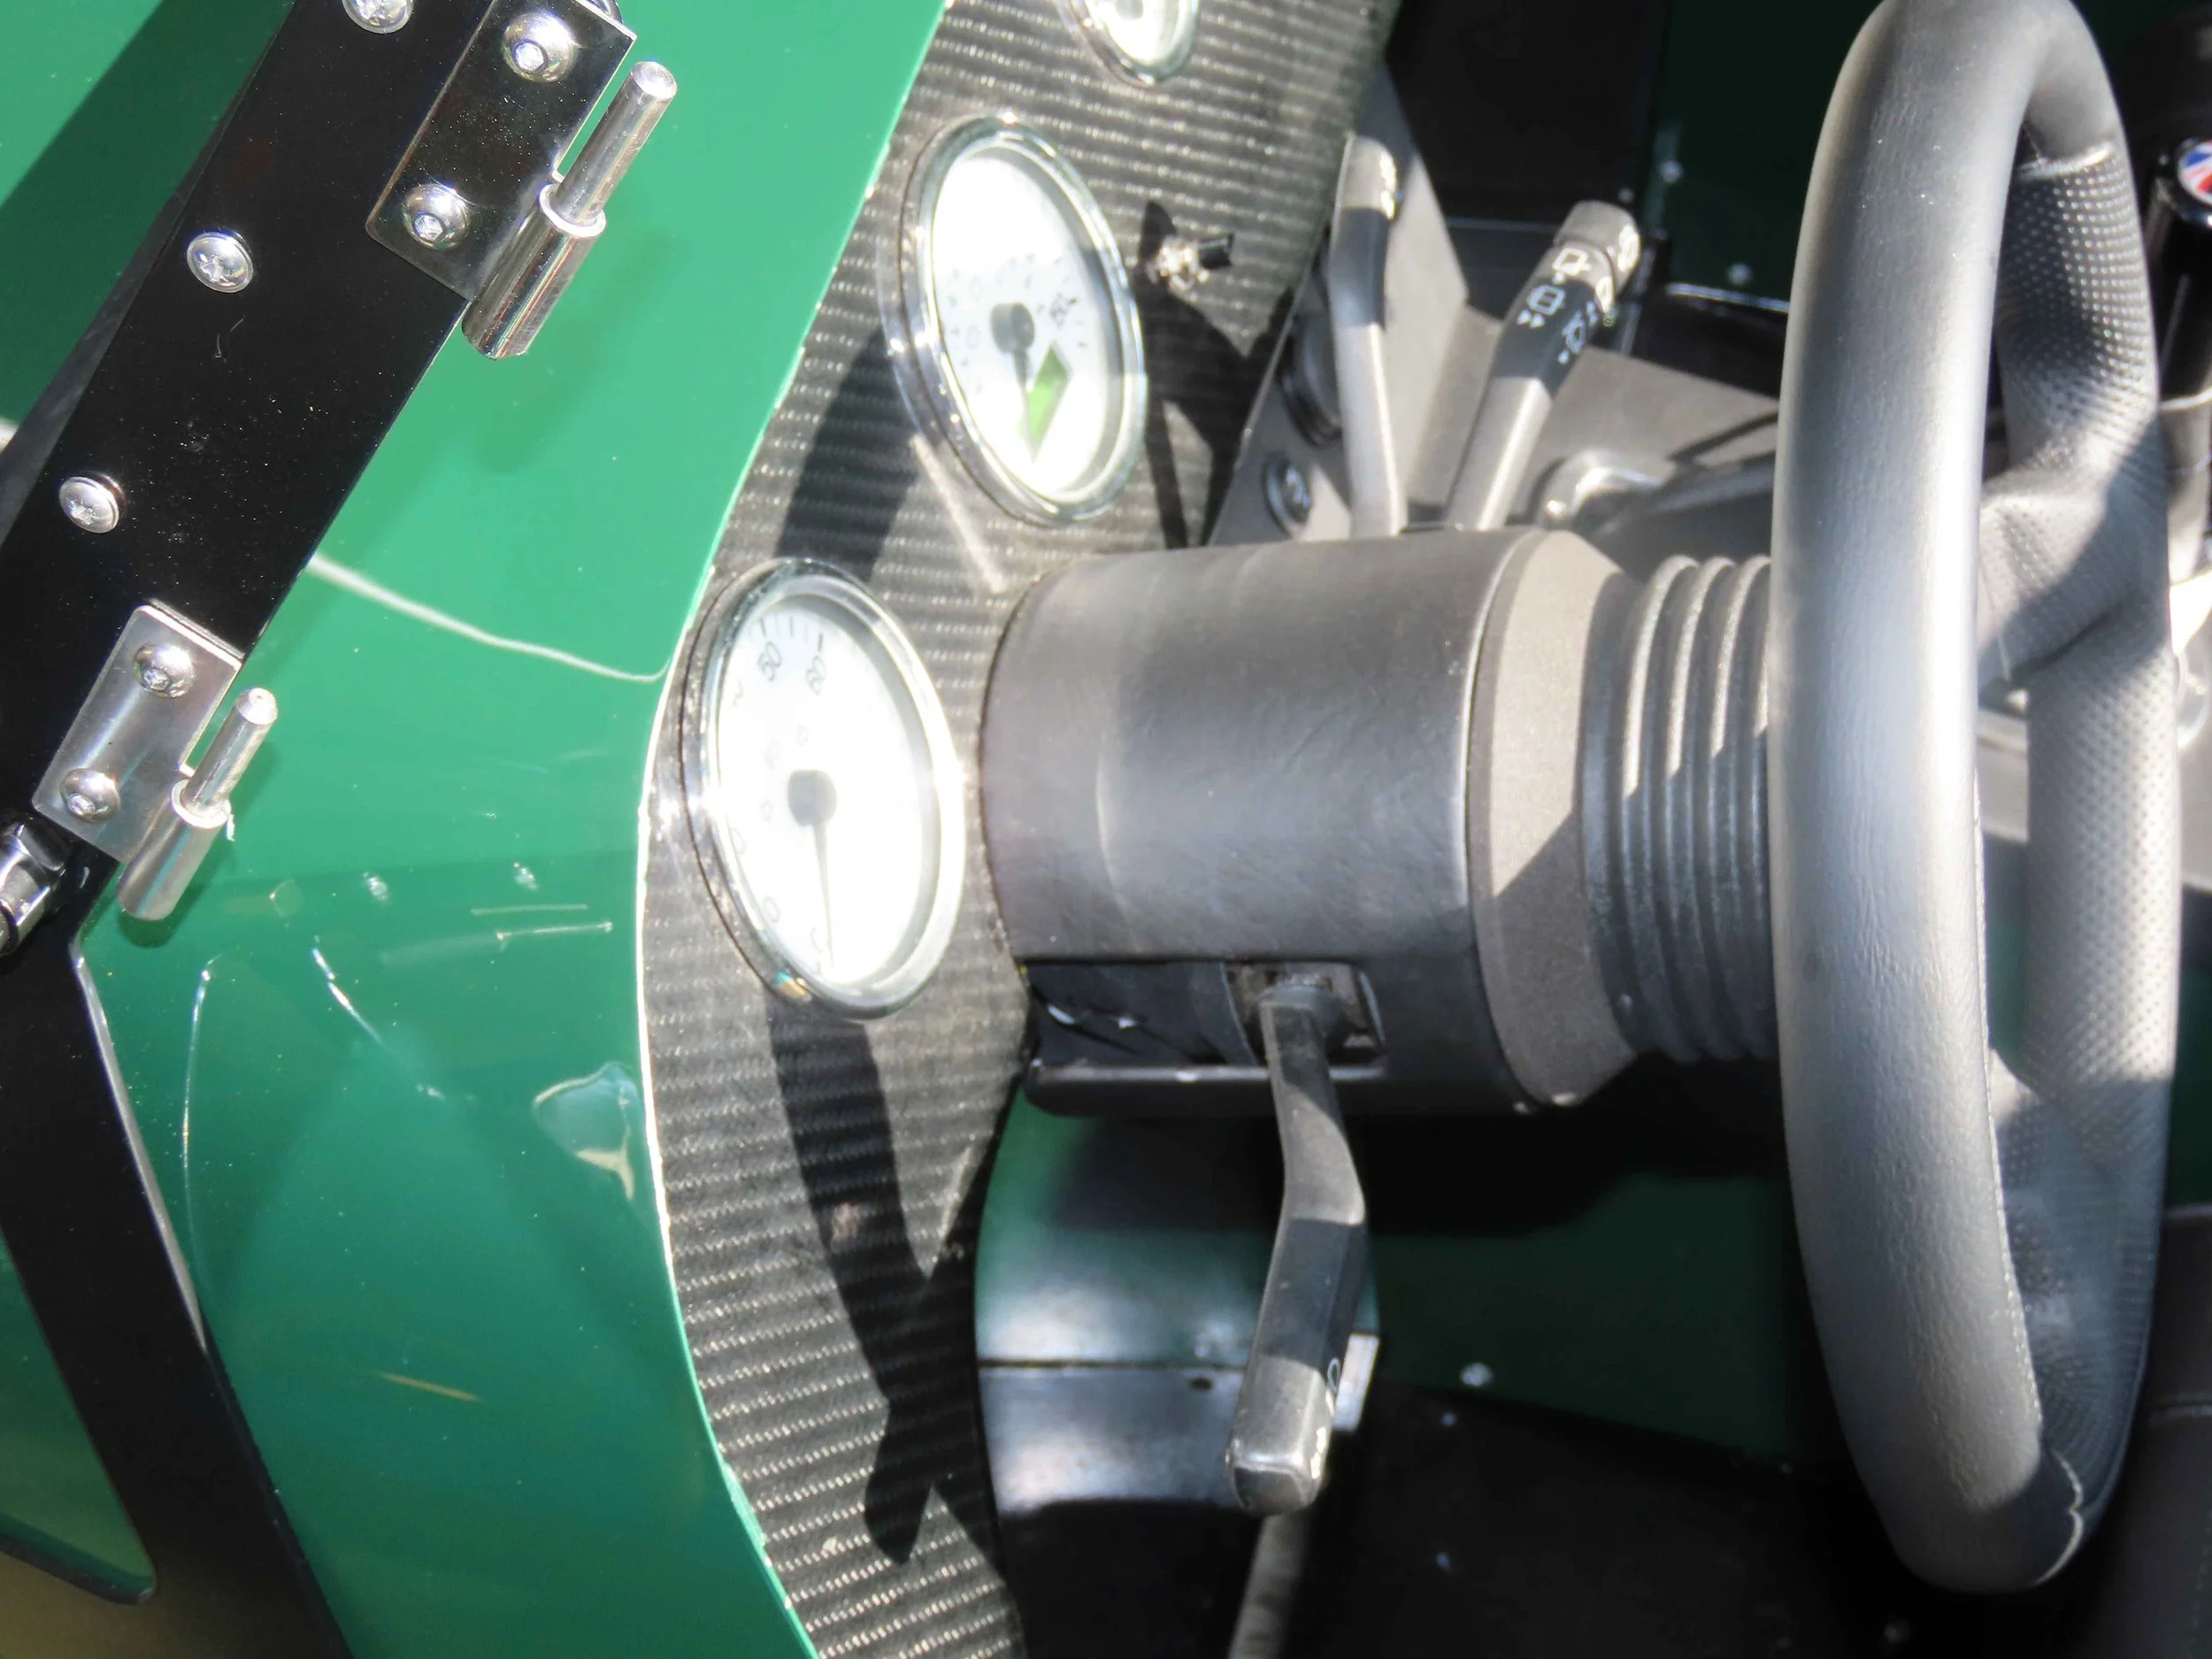
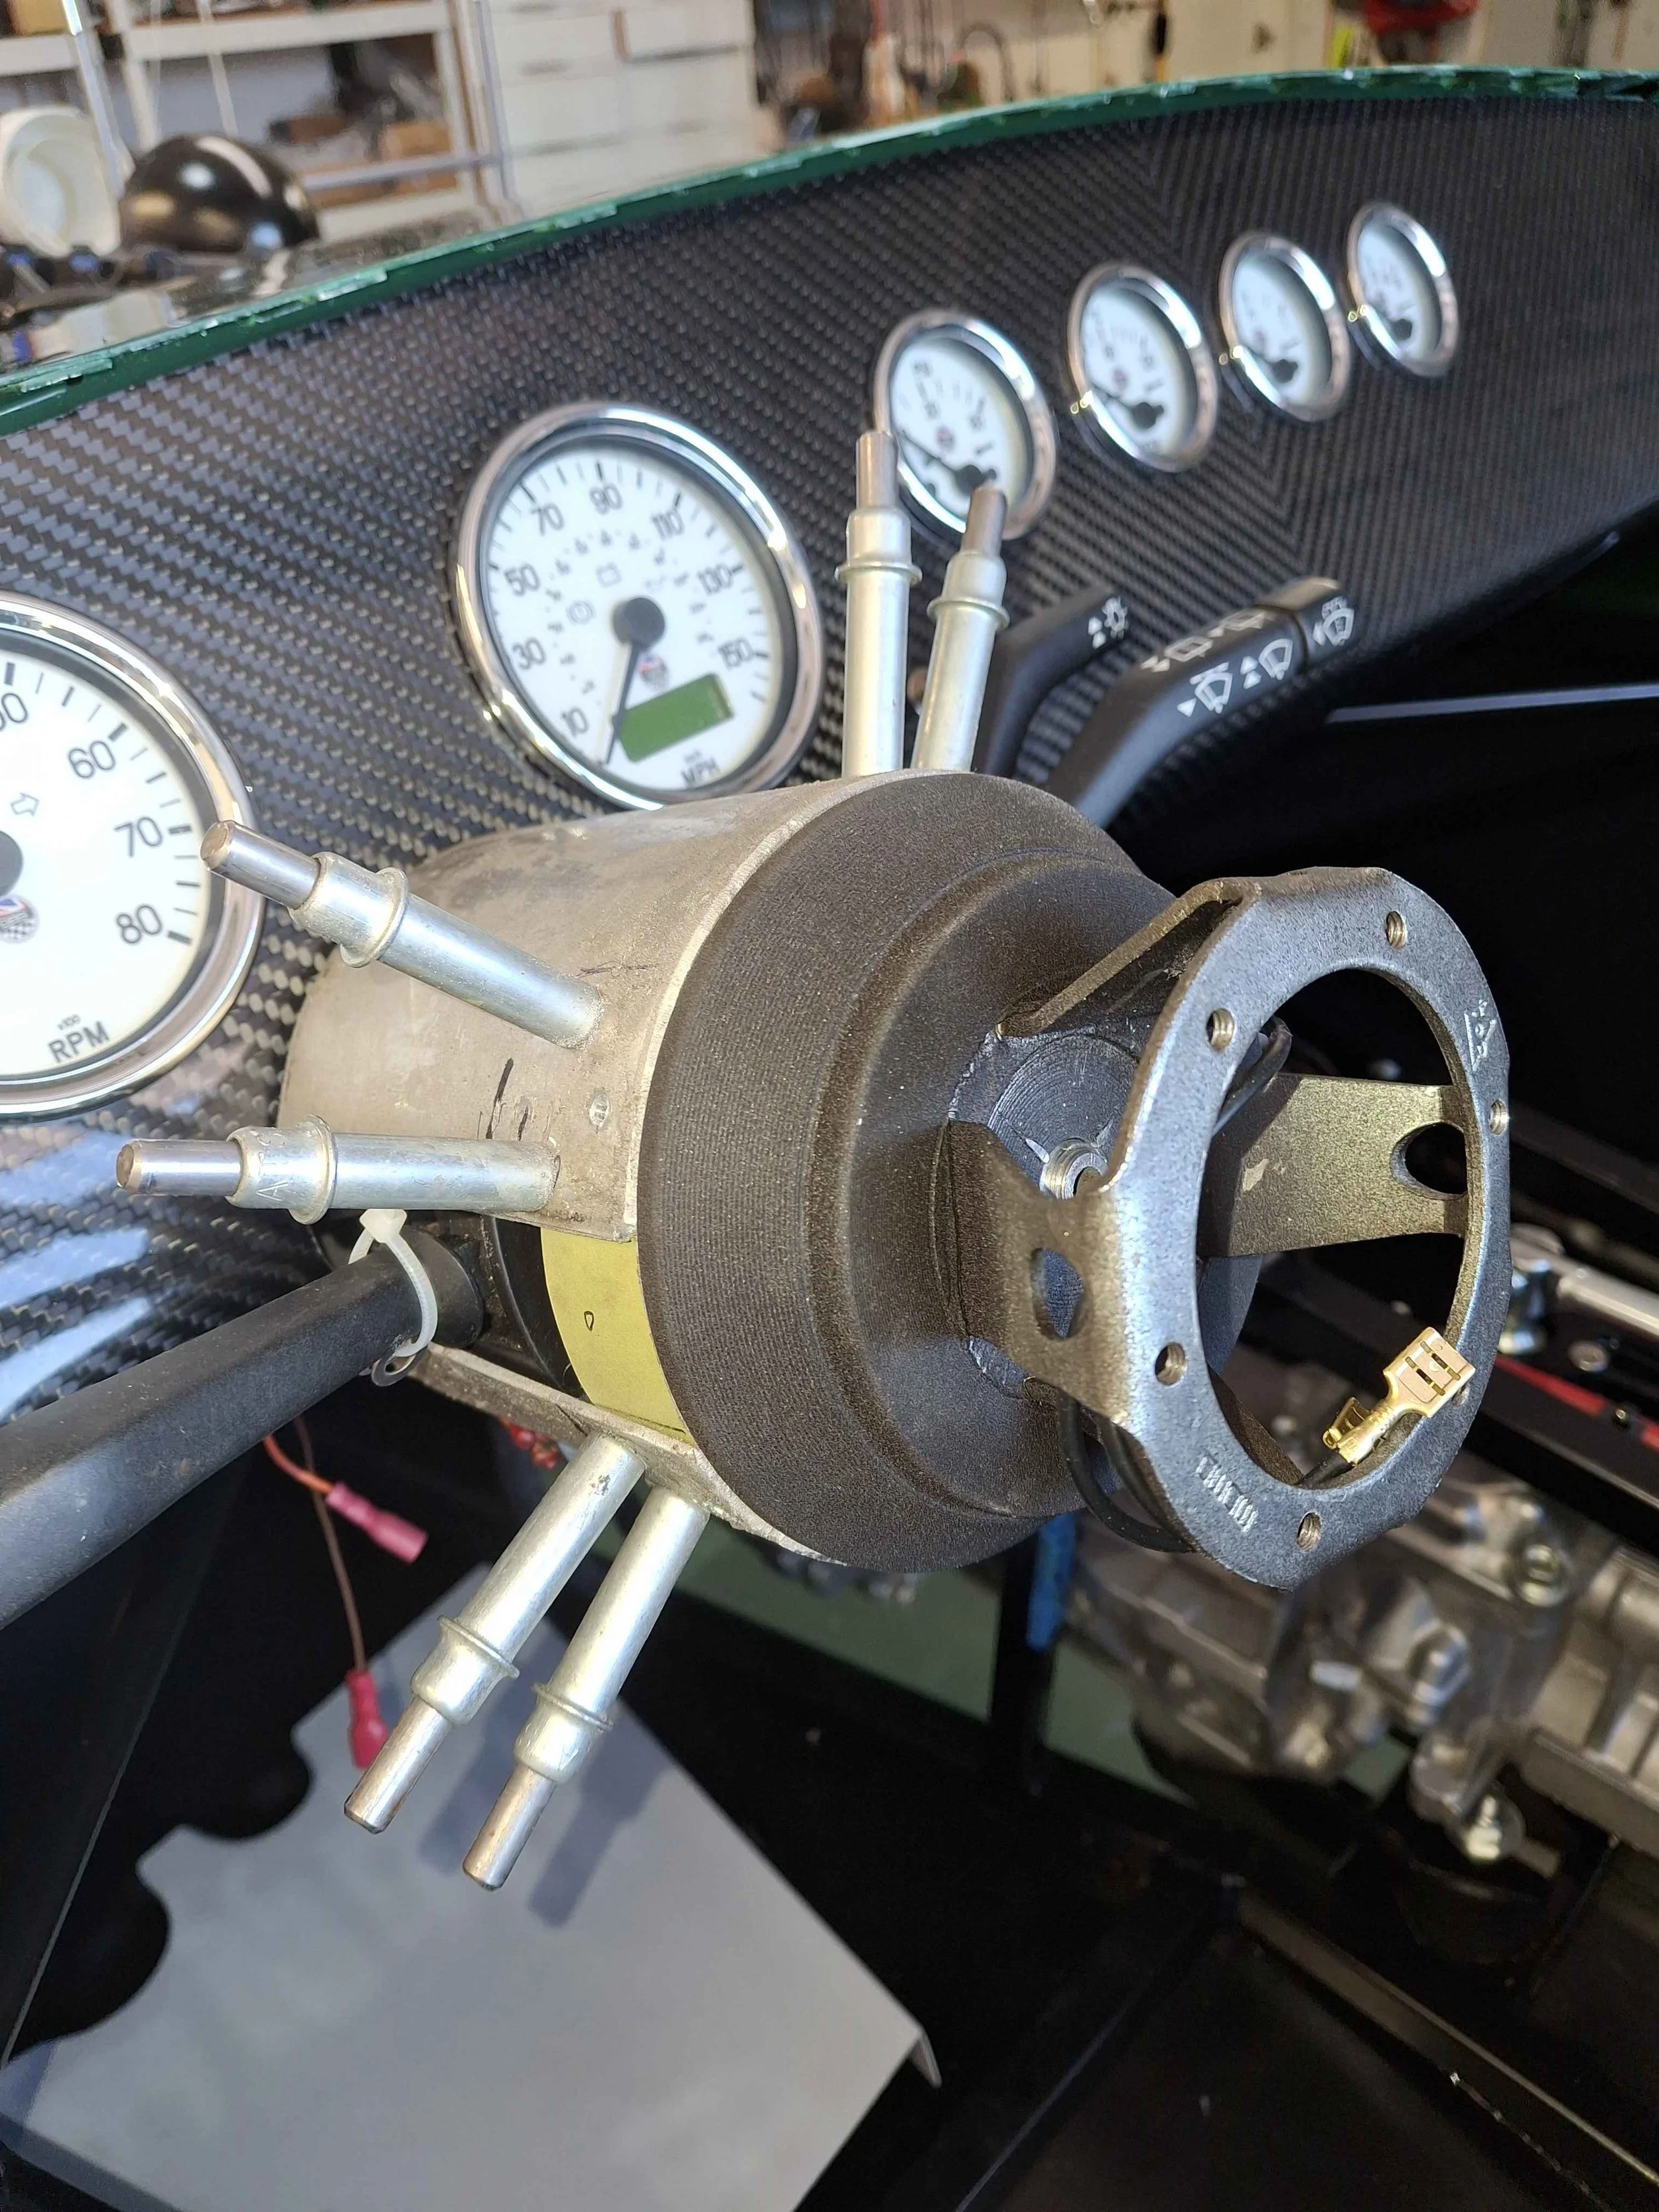
- Modification to the steering shaft surround to allow the push button in the center of the wheel to sound the horn. This one took a while – I think I used nineteen 3/32” rivets to put it back together after cutting it up. Recovered it with the same stuff I used on the center console and boots.
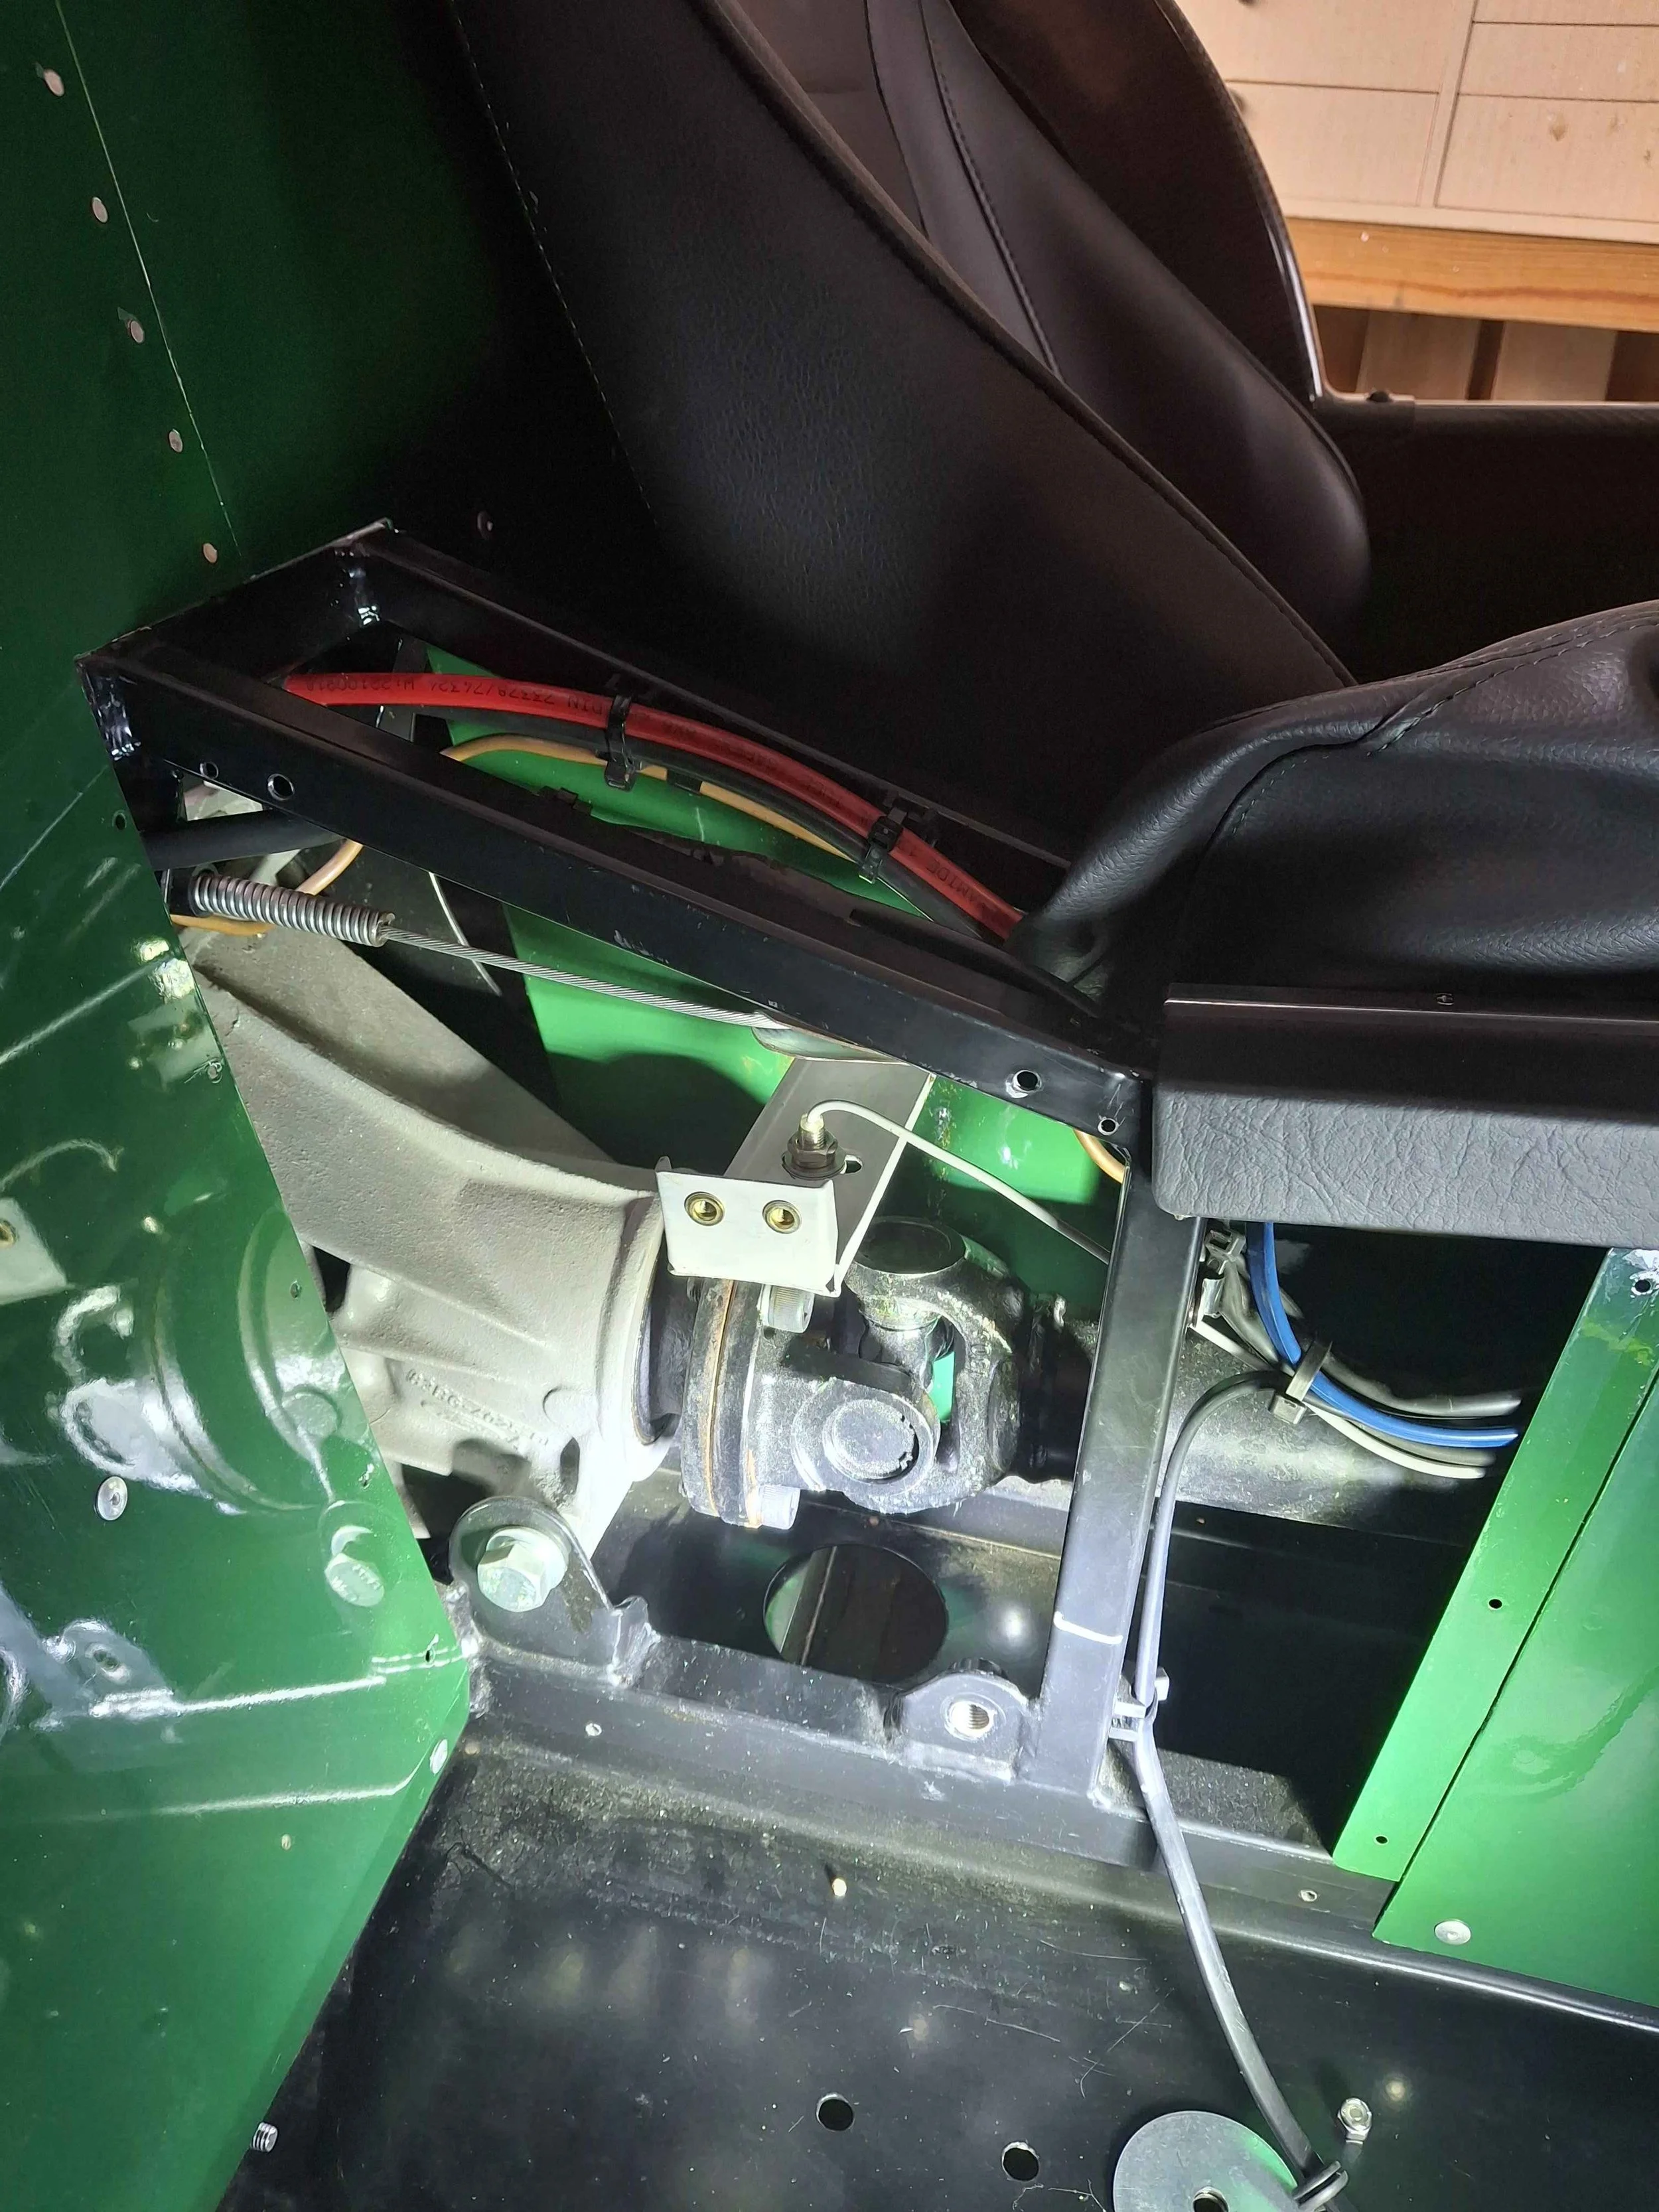
- Removeable panel on the right side beside the U-joint for access to the speedo sensor, wiring, etc.
- Hinge on the flat panel just forward of the firewall to allow access to the wiring under it. It’s held down with 3 6mm screws. Wiring and fuses for the heated seats are under there.
- Every aluminum panel on the car is painted on both sides with epoxy primer and finish paint. I live on a saltwater canal and corrosion is a major issue here.
- 6-32 rivnuts on the scuttle to attach the firewall with SS screws to ease removal if necessary.
- All rivnuts on the car are stainless steel for corrosion issues.
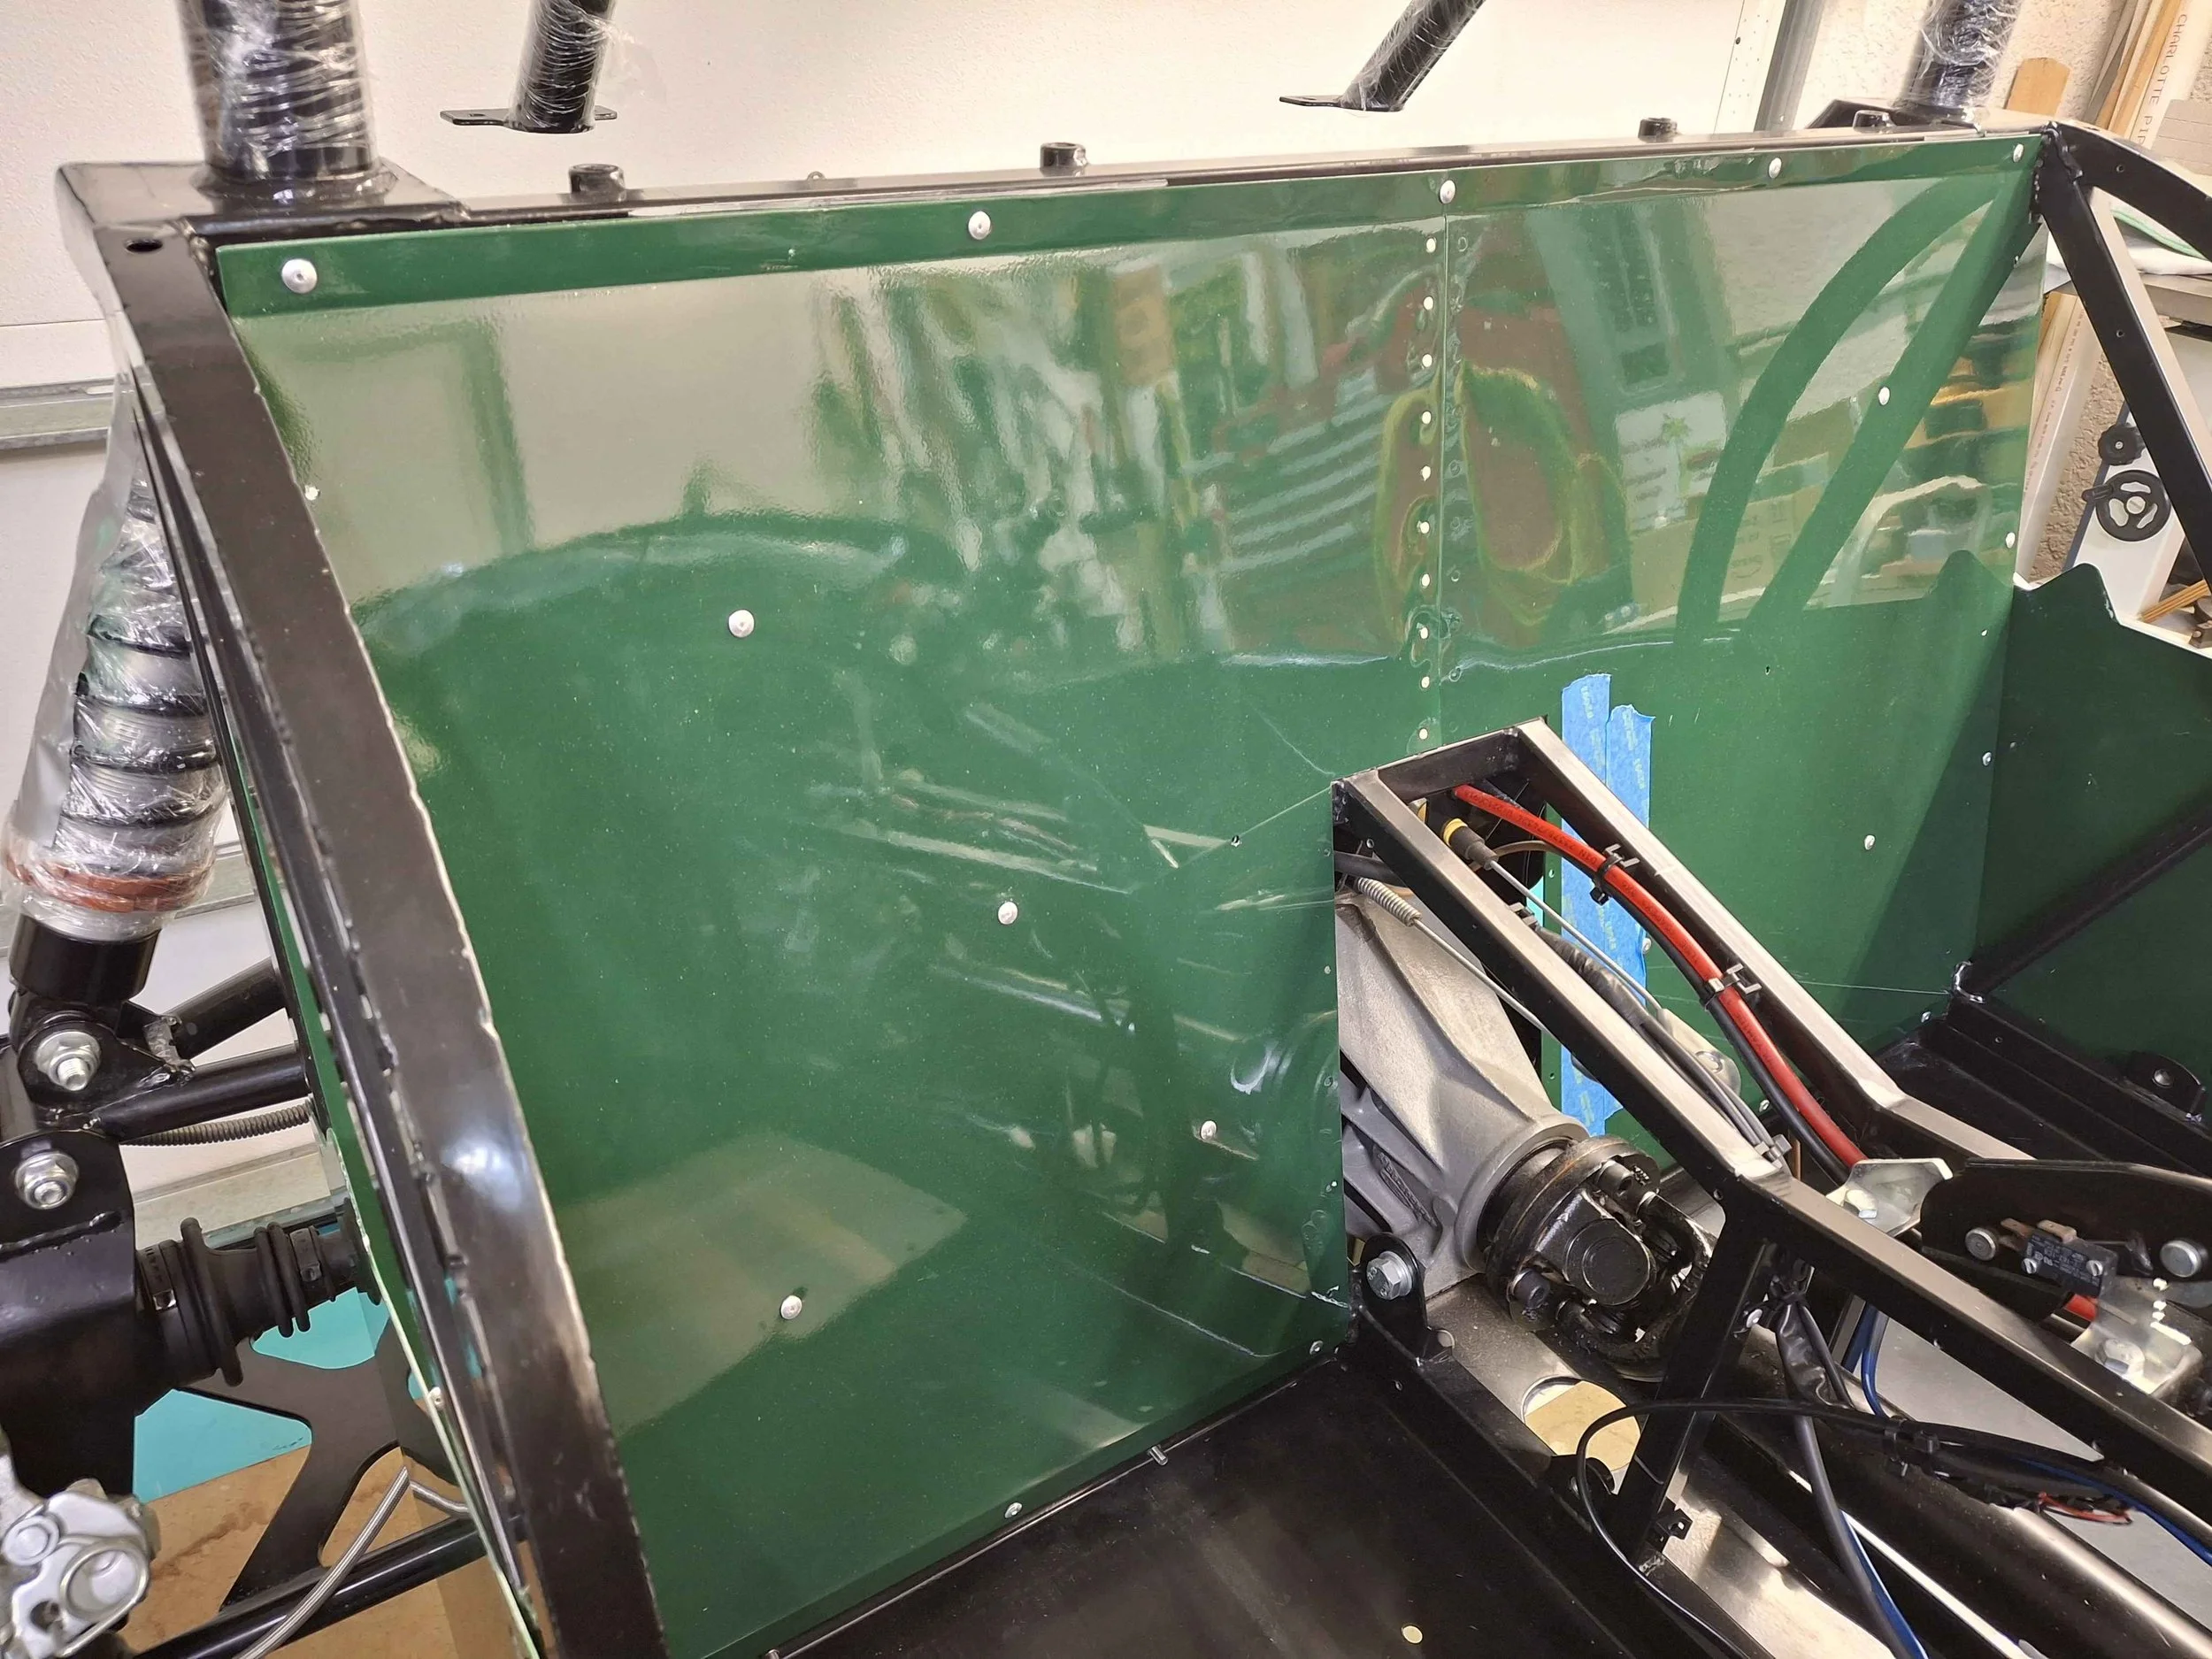
- I split the panel behind the seats to make it easier to fit w/o bending – connected with hard flush rivets after installing.
- The bracing flange to mount the dash to the scuttle was attached with 3/32” flush rivets.
- The only panels I bonded on are the footwells. This for relative ease of repair if needed. I used more rivets than called for and added beads of low modulus construction silicone on the outer side panels – these can be easily cut through to remove the panels if I get dinged. I will not race this car and a future owner could disassemble it and bond the panels on if needed.
- The only 6mm rivnuts(9mm holes) I put in the frame are a couple for the rear fenders and the oil catch tank in the nose. Things that don’t need much holding power like bonnet pins, hinged panel holddowns, boot panel over the diff, arch trim, etc. are 5 & 6mm screws in holes tapped into the square tubing with blue locktite as needed. All screws are SS.
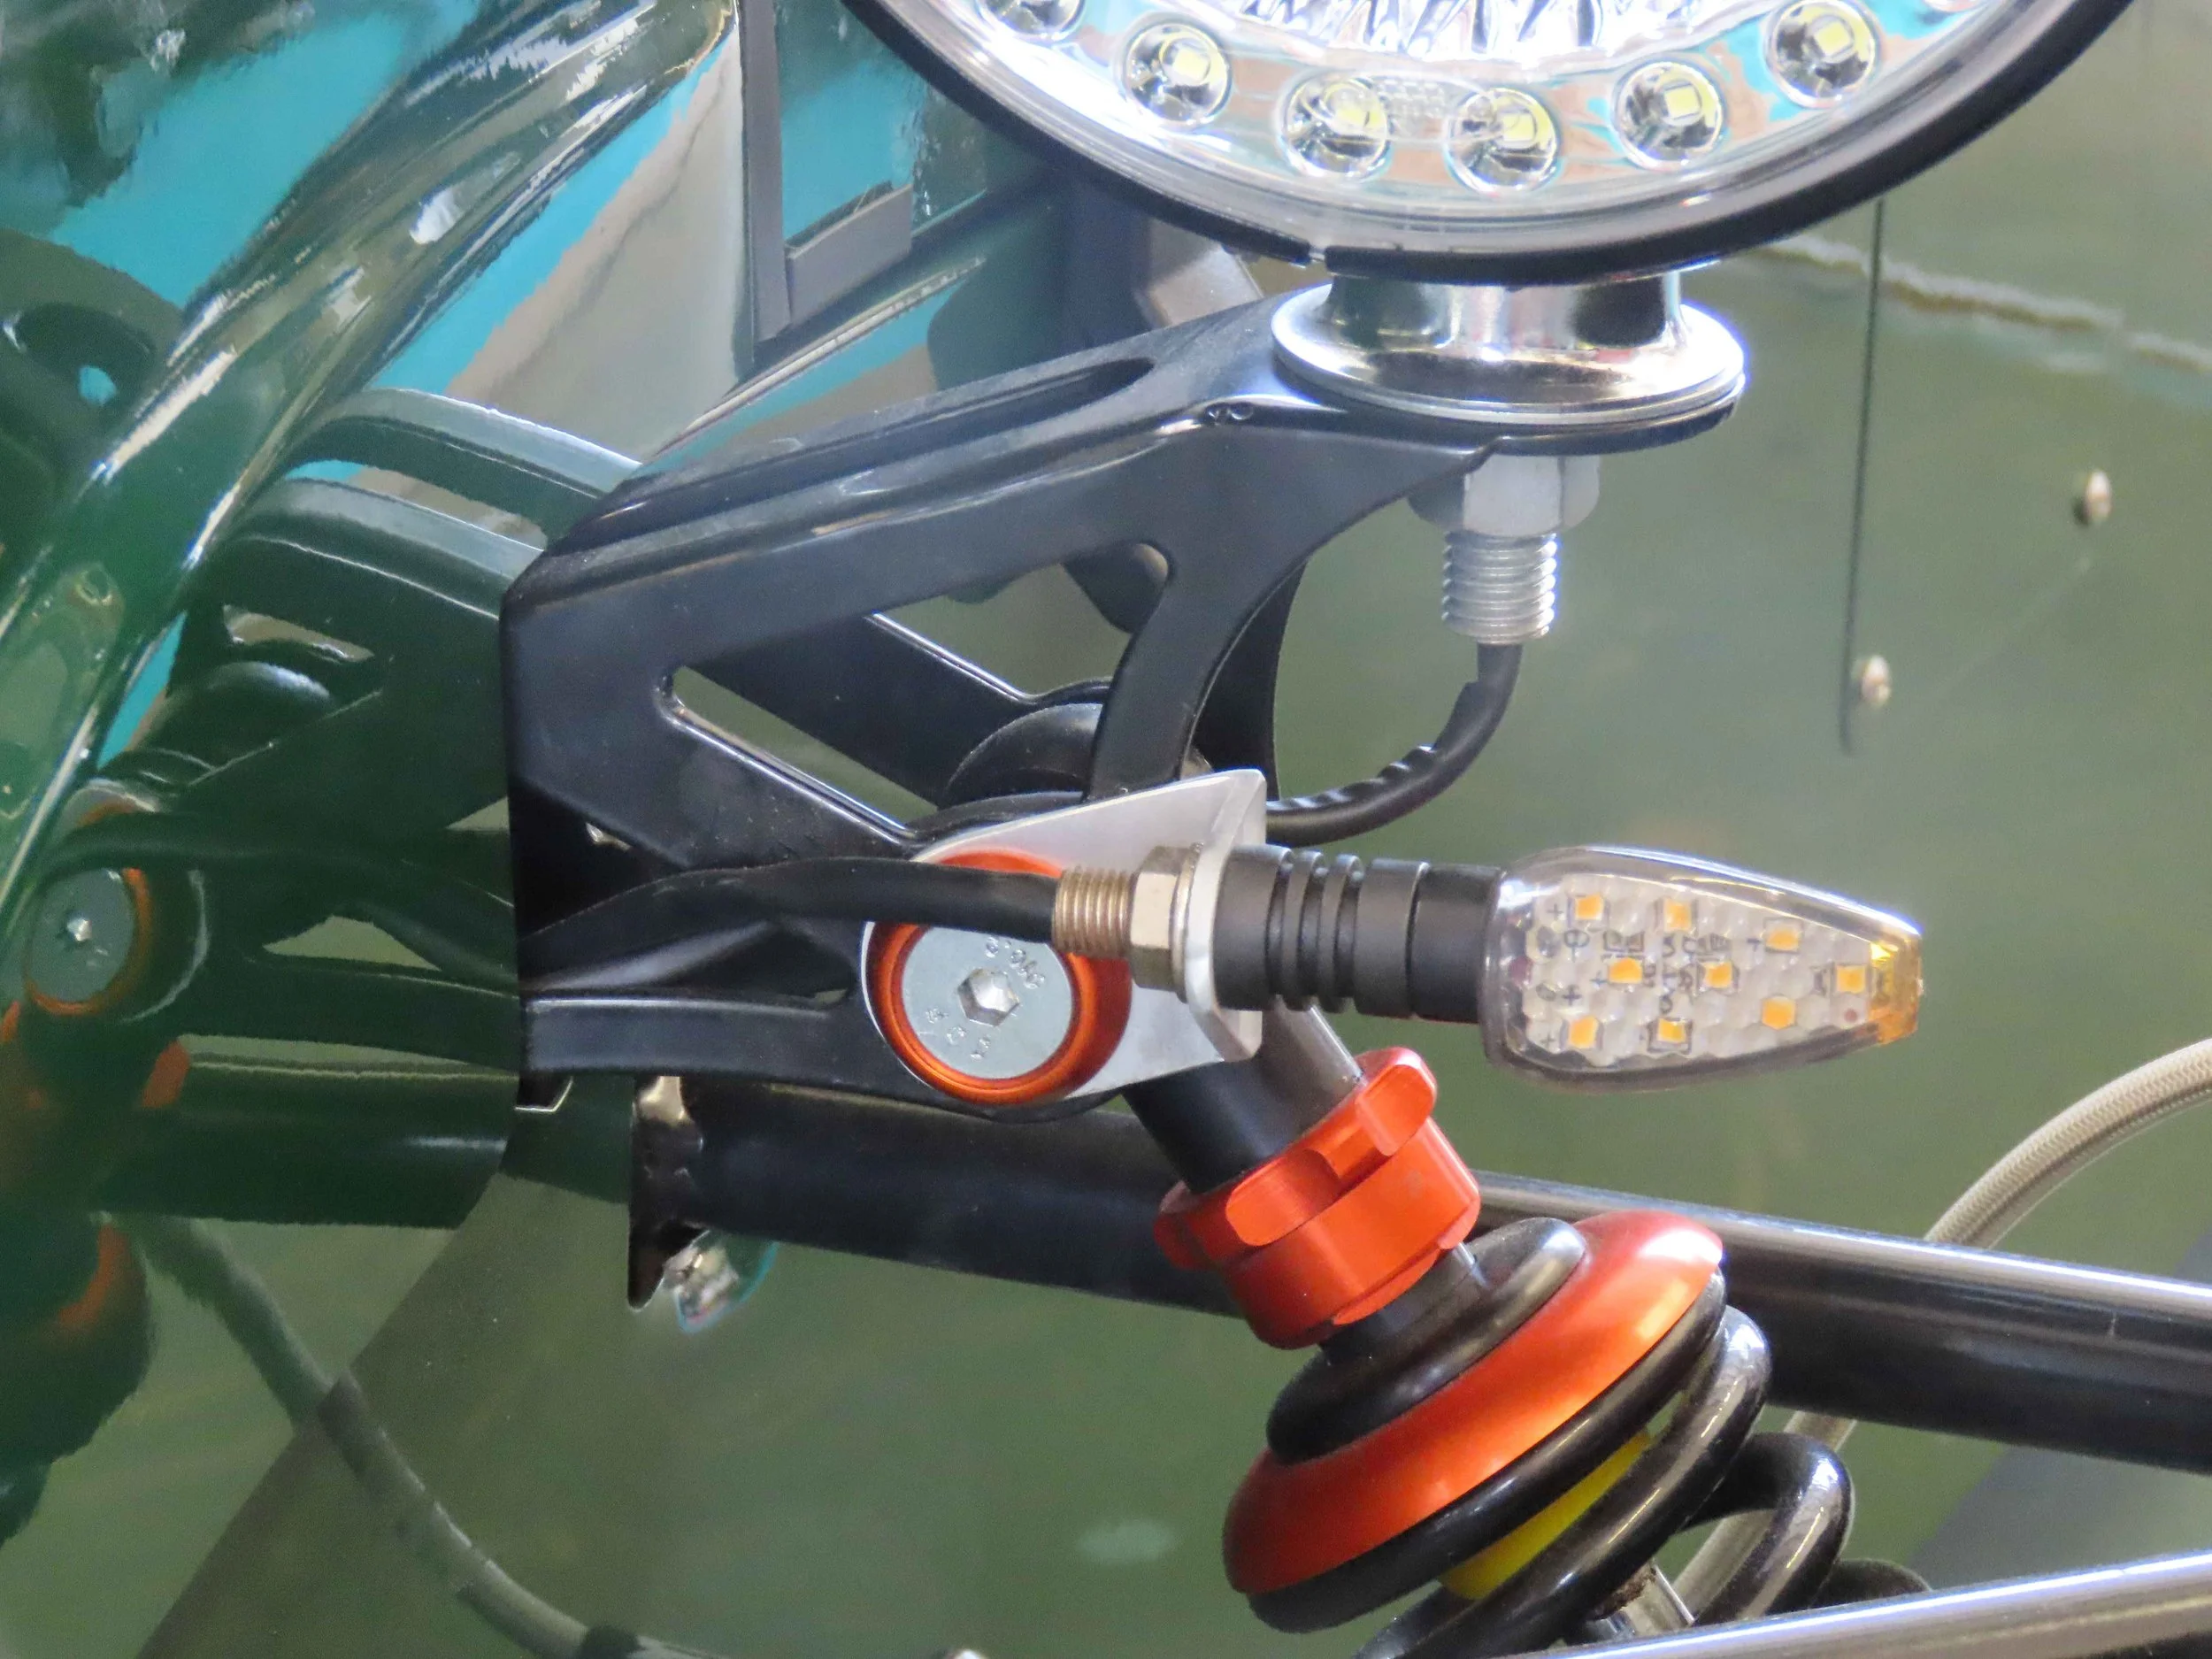
- Brackets made from aluminum angle to mount the front turn signals – allows removal of the nose w/o having to disconnect wiring. Probably only useful in the US.
- The trim rings around the shifter and hand brake were made from a 12” x 12” sheet of 3/16” 6061 aluminum, cut to shape and polished. I made the boots from Naugahyde I got from a local hobby store.
- I eliminated the rear fog light; no need or requirement for it here. Tail lights are LED units I got from Chris Watson with backup, turns, brakes built in. I didn’t care for the look of the lights provided. I would have used the current rear lights if they had been available then.
- I had the engine supplier install Crower stage 2+ cams and retainers; this thing really pulls hard when the revs come up.
- Installed 205F/225R tires. One side rubbed a bit at the rear of the back fender, but a little sanding fixed that.
- The boot is covered with carbon fiber panels I got from Amazon and is lockable. Liked the look plus I didn’t want to use the vinyl cover as boat-type “poppers” don’t fare well in the saltwater atmosphere here.
- The only carpeting I’ve installed so far has been on the sides of the footwells. I’ll try to find some rubber mats for the footwell bottoms. Will probably cut some small pieces of carpet for the area under the front of the seats but will not carpet under the seats. I’ll probably put carpet on the panel behind the seats. Will put some in the boot sides but the bottom will have a removeable piece. We have torrential thunderstorms here in the summer and it will get soaked; I want water to be able to run out quickly. I doubt I’ll put carpet beside the seats as they rub pretty hard against the panels as is.
There’s no IVA here in Florida, nor even an inspection of any kind. I had to take the car to a Florida state DMV office where the state assigned VIN sticker was applied. Evidently, the car had to appear “in person” to verify the number was actually attached to a car that didn’t already have one.
I have 250 miles on the car now and nothing has fallen off or caught fire… I’m having a great time with it”. Dana,B - Florida, USA.